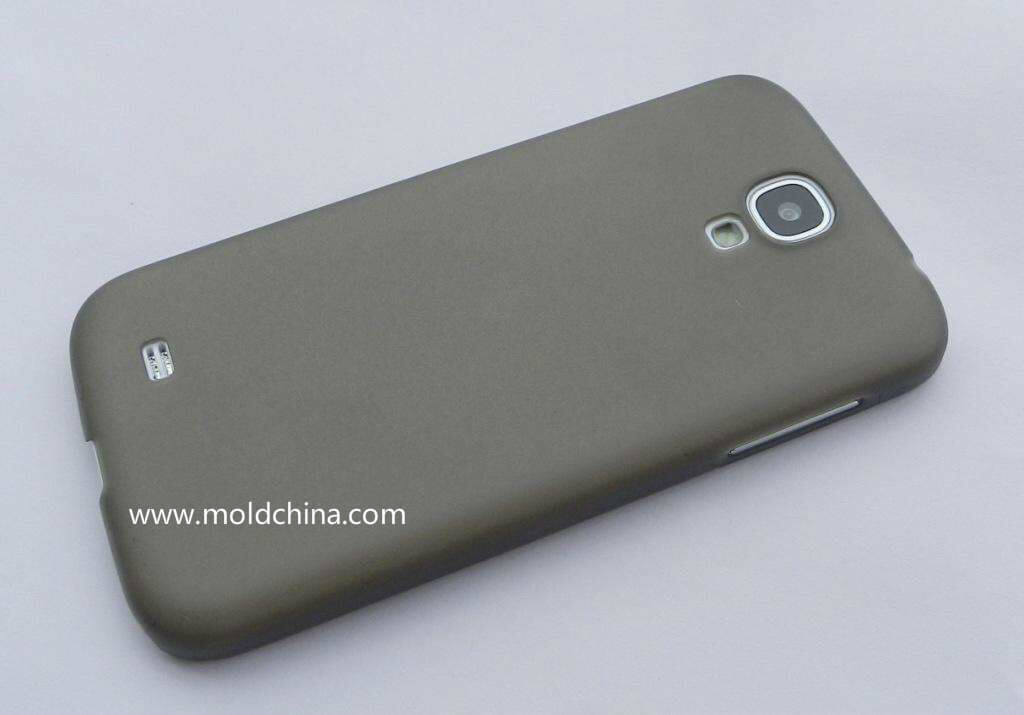
While our everyday life is filled with more and more plastic products, people start to be aware that they do not want them to look like “plastic” products. Therefore, the plastic injection molds decorated with the texture process are more welcomed because they cater to people’s interests.
【Purpose of Texture】
(1)Improve product appearance. The texture process is able to camouflage part of the shrinkage, welding line, parting line and steps of slider, etc.
(2)Product surface strength can be improved via texturing and sandblasting.
(3)Improve the look and feel of plastic products, to allow the creation of diversified and/or brand-new product designs.
【Principle of Texturing】
Allow chemical agents (e.g. sulfuric acid and nitric acid, etc.) to chemically react with mold steels, and at the same time control the reaction process to obtain various desired effects.
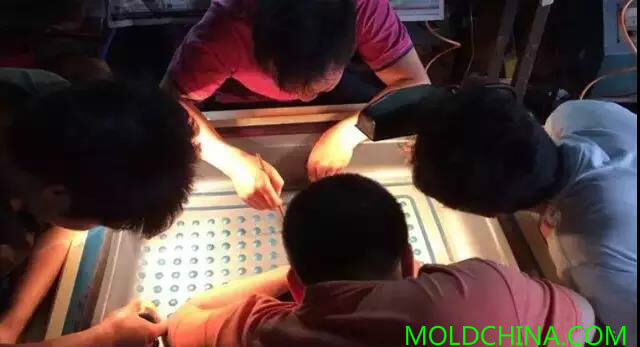
【Process of Texturing】
Mold Preparation- Filmmaking – Film Application – Exposure to Light – Corrosion – Cleansing – Post Treatment
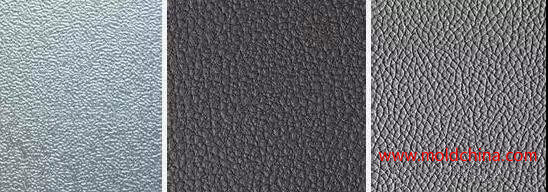
【Categories of Texturing】
Sand pattern, satin pattern, leather pattern, stone pattern, geometric pattern, HANDS and HN3D, etc.
【Procedure of Texturing】
- Cleansing: Clean the mold cavity surface, to remove surface oil/grease.
- Sealing: Apply adhesive paper or corrosion resistant coating to the cavity surface that does not need to be textured, so as to prevent corrosion. This is the most time consuming step, during which the 3 commonly used sealing materials include: Thick adhesive paper, to cover the majority part of the cavity surface; thin adhesive paper, to seal the details; and corrosion resistant coating, to cover the area that adhesive paper fails to cover, e.g. complicated curvy surfaces.
- Drying: Dry the anti-corrosion coating.
- Surface treatment: Carefully wipe the cavity surface to be textured using absorbent cotton, to make it free from any dirt, thus ensuring the texturing effect.
- Texturing: Apply a coating to the cavity surface to be textured and then soak it in the corrosive fluid. During this process, attention should be paid to the texturing status. Repeated soaking is required to get the desired textures.
- Sandblasting: Sandblasting serves 2 purposes: A). To remove the residue liquid on the cavity surface after cleansing, with ammonia and pressure washer; B). To tune the gloss of the texture; different levels of gloss can be achieved by using different sands and different pressure levels.
- Post treatment: Cleanse the cavity surface and apply rust protection agent before delivering the mold parts back to the mold manufacturer.
【Pre-texturing Requirements on Molds】
The pre-texturing treatment of a mold plays an important role in defining the final texturing effects. As a result, every detail should carefully considered:
-
Requirement on the draft angle (lower than 500mm): At least 1 degree for each 13μm of texture finish depth (excluding special textures).
-
Polishing Requirements:
- Apply 1,200+ sand paper for depth of around 5μm
- Apply 1,000 sand paper for depth of around 10μm
- Apply 800 sand paper for depth of around 25μm
- Apply 600 sand paper for depth of around 50μm
-
Parting line treatment: A 0.2 – 1mm margin is suggested; chrome plating is required after texturing, and it is also suggested to deepen the texture by 10μm.
-
Pre-texturing requirements on mold surface:
- No machining marks
- No welding marks
- No polishing marks
- No EDM marks
- Smooth mold surface
- Mold surface allows texturing
Common Post-texturing Problems
- Due to the fact that the mold cavity surface is roughened after texturing, the most common problems like scratches and stickiness to the cavity may arise. In some areas, the originally small draft angle will be made smaller after texturing, or even resulting in a undercut sometimes, so scratches are often caused. During the ejection process, ejector marks tend to appear due to unfavorable mold release, thus greatly affecting the part appearance.
- To resolve the problem of scratches and ensure smooth mold release, the textured surface usually needs to be sandblasted to reduce the texture depth and at the same time eliminate the acute angles caused by texturing. In the practical production scenario, it is very difficult to resolve the mold release problem by adjusting injection parameters, so release agent is usually applied to the textured surface to facilitate production. From the perspective of mold, the situation may be improved by increasing the draft angle in the scratched surface area/increasing the number of ejector pins.
All copyright reserved by injection mold maker Sositar Mould